
Topology : IP Server 192.168.0.1 - Router Wifi 192.168.0.2 - Klien 192.168.0.3 - 254
Konfigurasi DNS Server

Atur IP Server secara static
kemudian turn off firewall nya

Atur IP Client secara static
kemudian turn off firewall nya
Password Windows 2008 Server : Aa12345$

Computer - Properties - Advanced system - Computer name - Change
Setelah pergantian computer name - Restart Now


Restart Now

Server Manager - + Roles - + DNS Server - + DNS - + RIJASERVER - + Forward Lookup Zones
- Klik rija.com dan klik kanan - New Host (A or AAAA)


- Klik rija.com dan klik kanan - New Mail Exchanger (MX)
+ Klik Reverse Lookup Zones dan klik kanan - New Zone


PENGUJIAN DNS SERVER


Install WEB Server dan FTP Server
Server Manager - Klik Roles - Klik Add Roles
✓ Web server (IIS) - Next

Pengujian WEB Server
ke address bar kemudian panggil rija.com atau www.rija.com pada browser klien
Konfigurasi FTP Server


Click here to launch

Klik Kanan - Properties


Masuk ke folder C:\\inetpub\ftproot
kemudian buat sebuah folder dengan nama " Download File " dan buat file Text Document dengan nama " Catatan "

Klik Icon Play untuk Running FTP Server
PENGUJIAN FTP SERVER PADA CLIENT DI BROWSER FIREFOX / CHROME

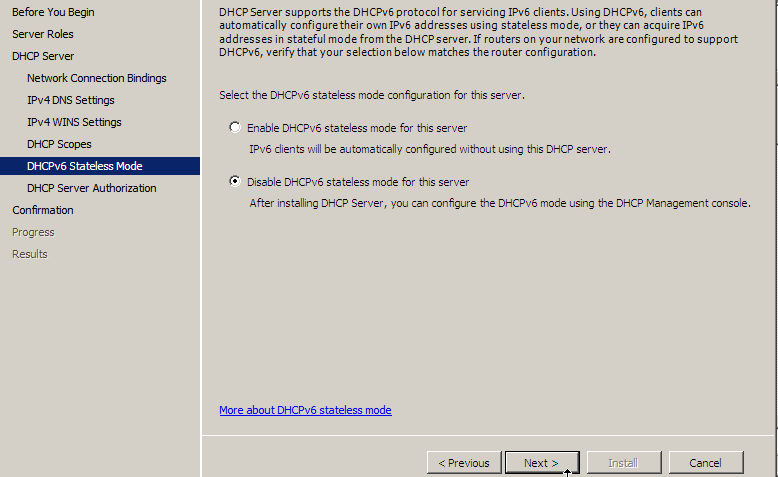
Konfigurasi DHCP Server
Server Manager - + Roles - Centang DHCP Server

KONFIGURASI MAIL SERVER
Server Manager - + Features - Add Features - Centang Netframework 3.0
klik start - Administrative tools - Group policy management

Pilih forest > domain > rija.com > Default domain > kemudia klik kanan pilih Edit

Akan muncul windows baru, kemudian klik
computer configuration > polices > windows settings > security settings > account police > password policy.
Lalu edit seperti dibawah ini.
Kemudian masuk ke CMD
Ketik gpupdate
Membuat user dan konfigurasi agar user menjadi user mail
Masuk ke start - Administrative tools - Active Directory Users and Computers

Klik kanan - New - User


Password : Aa12345$
BUATLAH SATU USER LAGI DENGAN CARA YANG SAMA


LAKUKAN HAL YANG SAMA KEPADA user client2
Aktifkan feature SMTP
Server Manager - + Features - Add Features - Centang SMTP server


Access - Relay - OK
Install hMailServer
Password : Aa12345$


Buat juga untuk client2
Settings - Protocols - SMTP


Advanced - Auto-ban - Hapus Centang Enabled

Atur ip range my computer seperti dibawah

Hilangkan centang External to external addresses
Test domain pada menu MX-query dan resolve

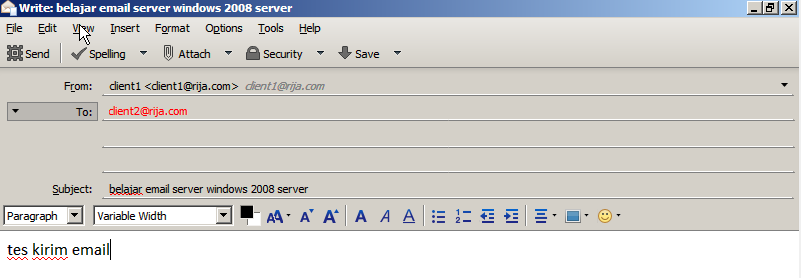
Setelah thunderbird mail dijalankan langsung daftar akun email

Setting 2x

Setting 2x

Setting 2x

Setting 2x


.jpg)

